Recipes are a premium feature of the Data Wrangles add-in. Contact Us to get access to this feature.
Recipes are a very powerful function of the Wrangles add-in, they allow a series of Wrangles to be defined and run as an automated sequence. Recipes in Excel work just as they do in Python Recipes with just a few minor exceptions.
¶ Running a Recipe
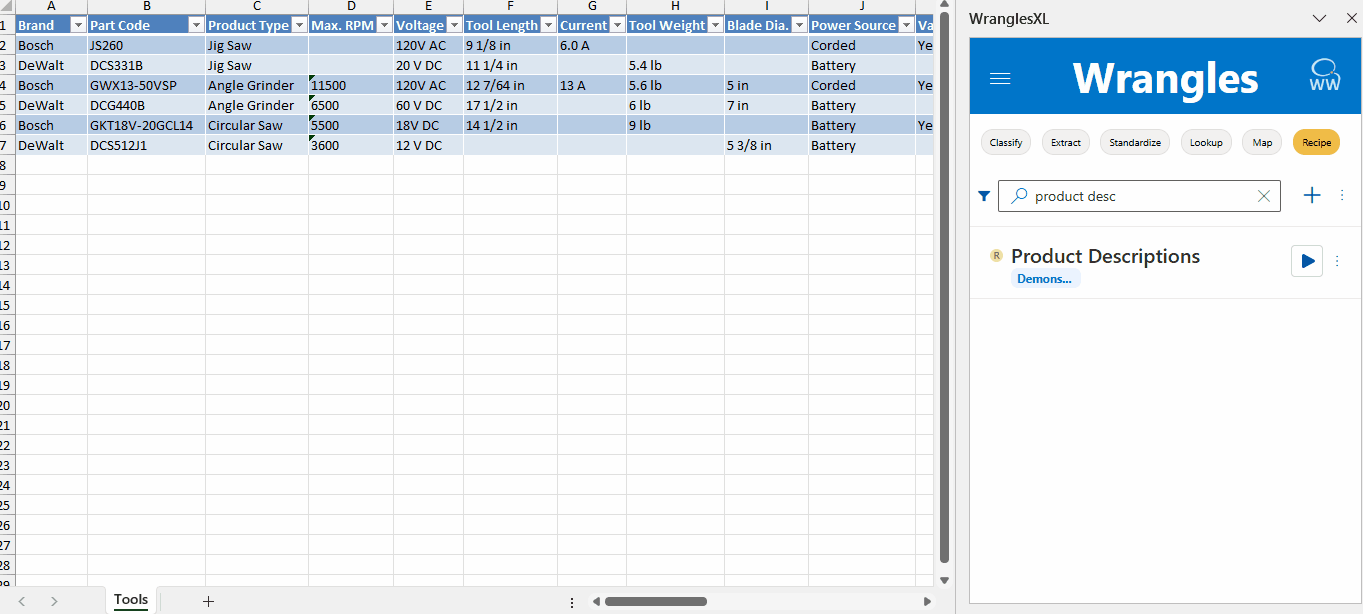
Like all other Wrangles, running a recipe in Excel just takes the click of a button. Simply highlight the data you wish to Wrangle and click the run button just as you would with any other Wrangle in Excel. The gif below shows an example:
Recipes can also be ran while in edit mode. This allows users to test changes they have made, before saving.
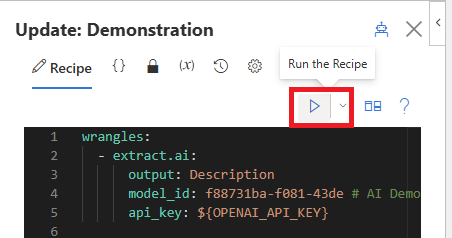
To run a recipe from edit mode, first open the recipe for editing and navigate to the Recipe tab. In the top right you'll notice a play button, click this to run the recipe. The screenshot below shows the run button outlined in red.
As with running a recipe from the task pane, you will first need to highlight your data before running the recipe.
You can stop a recipe during its run using the escape key.
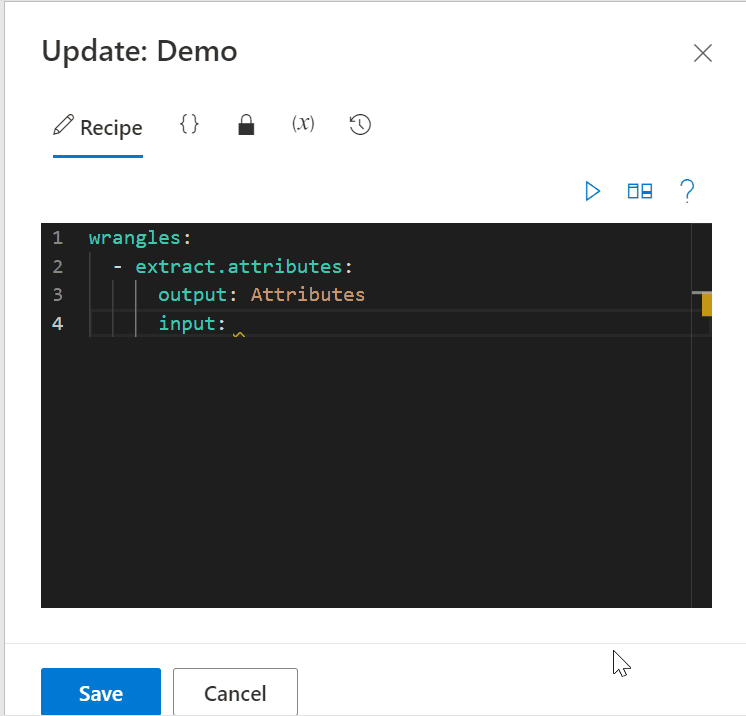
¶ Writing a Recipe in Excel
Recipes in Excel use the same syntax as in Python. See Python Recipes for full documentation.
Writing a recipe in Excel is very similar to writing a recipe in Python, but there are some minor exceptions.
First, recipes in Excel output data next to the selected range of values by default. To output to a new sheet, see the excel connector.
In Excel there are also tabs called Edit, Secrets, Functions, and Variables as well as a Compare button. The below screen shot shows the Wrangles Task Pane for writing a recipe.
¶ Creating a Recipe
To create a new recipe, click the + icon at the top right of the task pane, this will open up a new recipe editor. When saving the recipe, users will be prompted to name and assign an owner of the recipe (users, teams or organizations which will automatically be set as admin). Only after a recipe is created can secrets be added.
¶ Edit
In order to edit a recipe, you must have edit permission as either an Editor or an Admin. To open the edit panel, click the menu button next to the recipe and select Edit.

When a recipe has been edited but not yet saved, a confirmation window will pop up when trying to close the edit pane. This helps to protect users from losing recipe updates.
¶ Wrangle Search
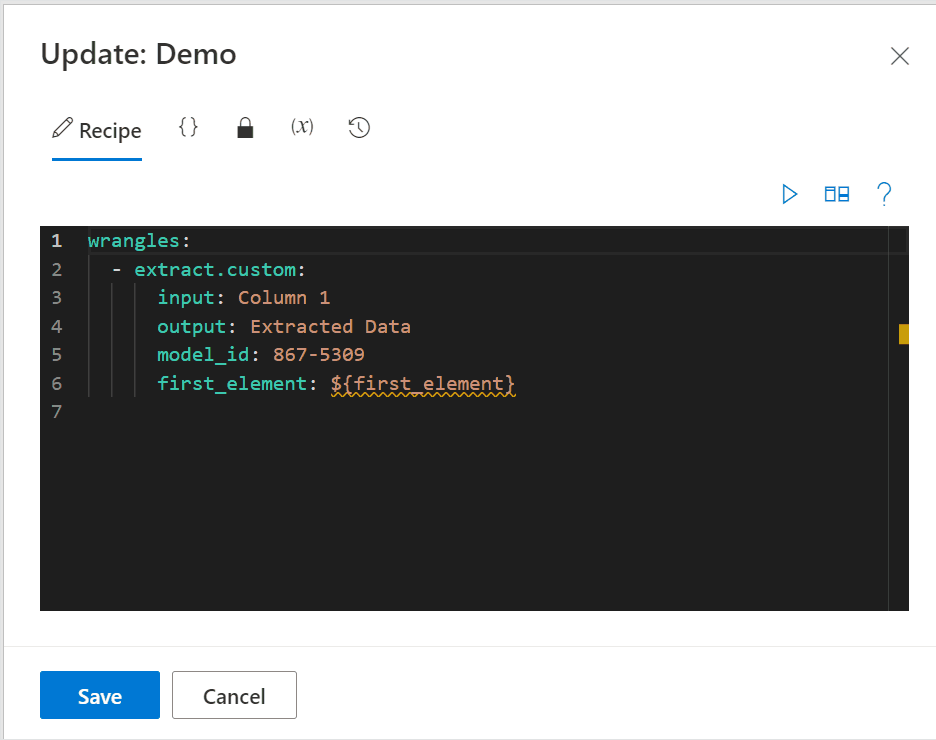
When adding a custom wrangle to a recipe, you will of course need to have its model_id as well. Wrangle Search makes finding the associated model id easy, and doable from the edit tab.
To navigate to the Wrangle Search, right click in the edit pane then select Wrangle Search. Here, all of your custom wrangles are listed. Type the name of your wrangle in, then double click it to add its model_id to your recipe.
The dropdown menu to the left of the search bar can be used to filter your wrangles.
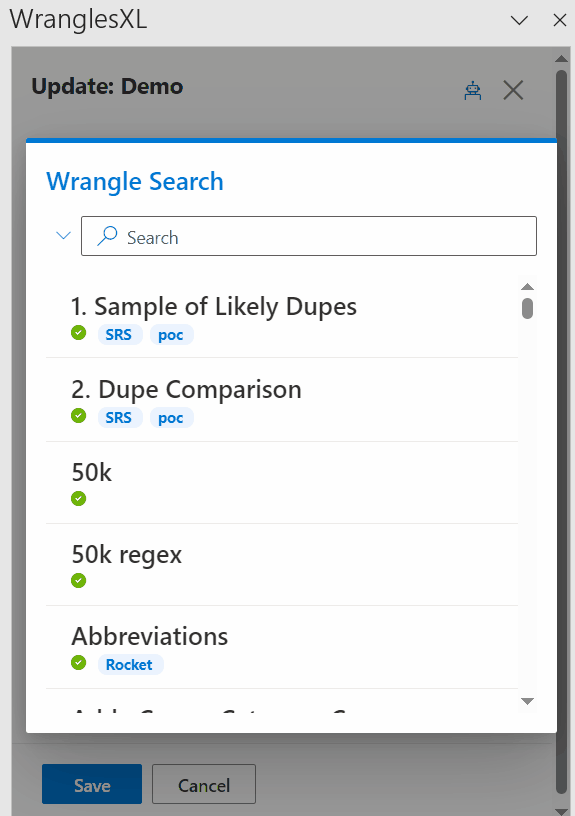
This same filtering can be achieved manually by typing in "purpose:standardize", or any other variation for which you want to filter.
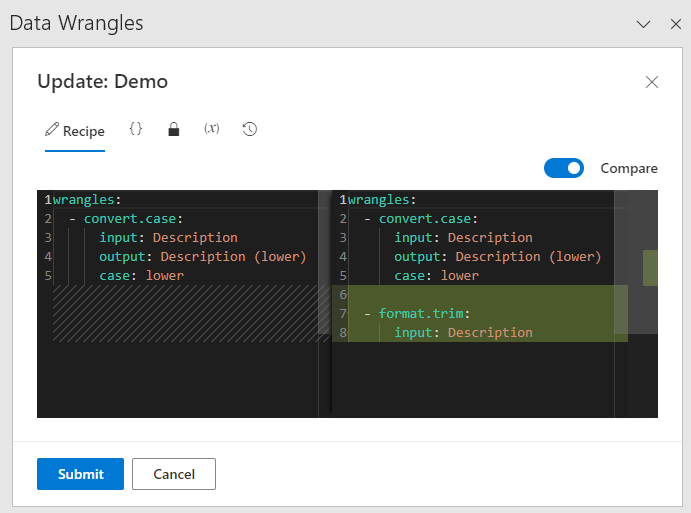
¶ Compare
When the compare button is selected, the previous version of the recipe will appear to the left of the current edit. Additions are highlighted in green on the current edit and removals are highlighted in red on the previous version. Edits cannot be made while in compare mode.
¶ Debug
Recipes can be run in debug mode which allow users to put break points anywhere in a recipe in order to help debug an issue.

Break points allow users to ignore everything below them. So, if a user suspects an issue at a point in the recipe, they can add a break point at that wrangle then run the recipe to confirm. This helps to debug without having to edit the recipe. Break points are added by clicking to the left of the desired row number.
¶ Secrets
Secrets are variables that are not editable. This allows them to be set and used without being accessed. Organization and User secrets are accessible by users that belong to a given organization or that are set by the user in their account settings. Both User and Organization Secrets can be accessed in recipes under the secrets tab by clicking the Show Org and User Secrets button.
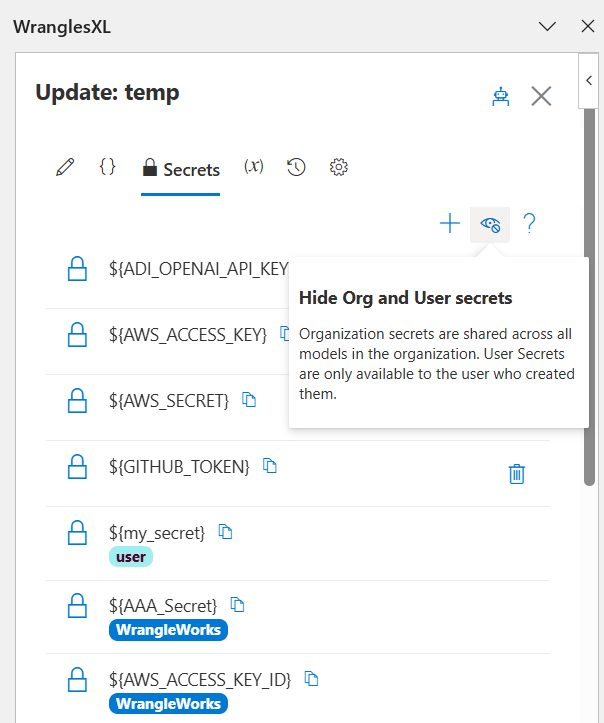
¶ User/Organization Secrets
User Secrets belong to the user that sets them. Like recipe secrets, they cannot be edited, only added or deleted. To set user secrets, navigate to the account page on the WranglesXL add in. From there, scroll down and click on Secrets. This will take you to your User Secrets page where you can add or delete your secrets.

Organization secrets belong to an entire organization and can be set by admins of that organization. To set an organization secret, navigate to the Organizations page on the Account Management page. There, you will see a list of organizations you belong to. Click on the name of the organization and navigate to the Secrets tab where you can add or delete organization secrets.
¶ Recipe Secrets
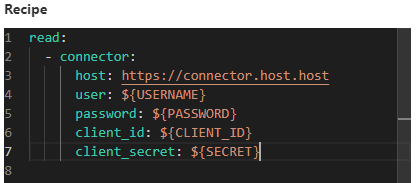
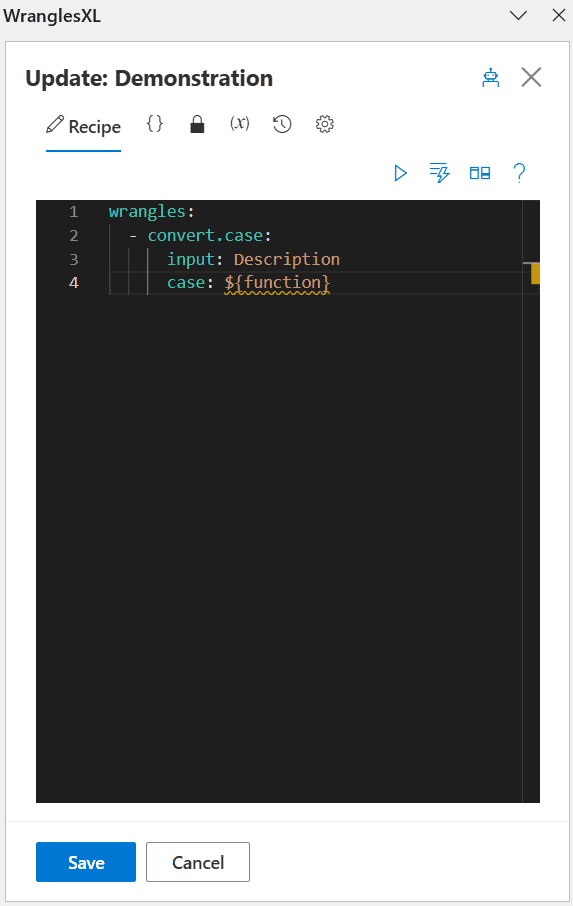
The secrets tab is used for any kind of log-in credentials needed for the recipe. Things like passwords can be added under a given name and cannot be accessed once they have been added. Secrets can be added or deleted but because you cannot access them, they cannot be edited. To use a secret simply wrap it with ${} just like you would a variable. See the gif below for an example of how to create and use a secret.

Secrets are used by wrapping their alias with '${}' and you can pass them wherever you'd normally use the secret. In the image below, USERNAME, PASSWORD, CLIENT_ID AND SECRET are all secrets being passed to the recipe.
Secrets can also be accessed by right clicking and navigating to the variables section of the context menu.
¶ Functions
The functions tab is where all custom functions are stored. Custom Functions allow you to use the power of Python to write custom Wrangles. Although the gif below demonstrates a very simple function, the possibilities are endless.
Custom functions can be inserted into a recipe by right clicking, then navigating to the functions section of the context menu.
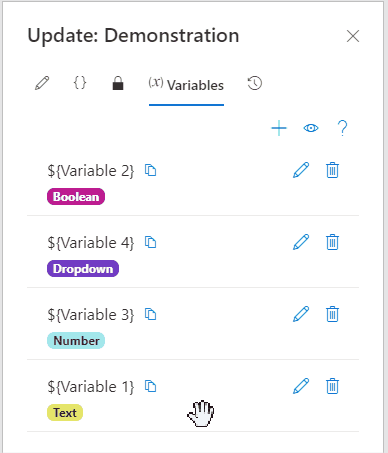
¶ Variables
Variables allow users to avoid hard coding within the recipe. They are accessed just like secrets(${my_variable}) and can be passed anywhere in the recipe.
The variables tab allows you to store variables that can be used in the recipe. Like secrets, they are wrapped with ${}, but variables can be edited and do not have a value until the recipe is run (except for constants) and the user gives it a value. When a recipe is ran that uses variables, a pop-up window will appear prompting you to assign the variable a value. Variable names are limited to A-Za-z0-9_ characters but the Title can be set to give them a user facing alias. They can also be toggled on or off using the Enable button located in the edit menu.
Variables can be of ten different types: Text, Multiline Text, Boolean, Number, Dropdown, Date, Columns, Function, Constant or System Variables (which are built in). The type is set when creating a variable but can always be changed later by clicking the edit button.

The order of variables can be rearranged by clicking and draging in the variables tab.
Variables can be inserted manually, by typing them out (ie "${my_variable}"), or by right clicking in the recipe and selecting from the variables dropdown menu. Here, you will also see that all of the system variables are included in the dropdown as well.
¶ Types of Variables
¶ Text
Text variables are short strings of text. Users have the option of setting a default value, which will appear in the text box when the recipe is ran. Default values can be overridden by simply replacing or adding to the text in the text box.

¶ Multiline Text
Multiline text variables allow you to input text with multiple lines, as opposed to a single line. Like text variables, they too allow users to set a default value.

¶ Boolean
Boolean variables are variables that take on either a True or False value. A default value can be set, and overridden if need be when the recipe is ran.
¶ Number
Number variables take in a single number. Like the previous variables, a default can be set and overridden when running the recipe.
¶ Dropdown
Dropdown variables allow users to select the value(s) from a dropdown menu. Dropdown variables can be set to single selection, or multiple selection. A default can be set, but users can only select values from the dropdown list. This makes dropdown variables unique when compared to the other types since users without edit access cannot add or delete values.
¶ Date
Date variables are used to pass a date through to your recipe in mm/dd/yyyy format. Once created, the value is selected from a calendar.

¶ Columns
The columns variable is a dropdown list of all the column headers within the selected data. Like dropdown variables, columns can be set to single or multiple selection. If there has been a mistake in the selected data, simply select the correct data and click the refresh button and the column headers will be updated to reflect the new data selection.

¶ Function
Allows users to use a python function to set the value of a variable.
Note: Other variables can be referenced by name in the parameters of custom function variables.
¶ Constant
The constant variable is a variable that is set to a constant value. This can be used as an alternative to secrets for non-sensitive data.
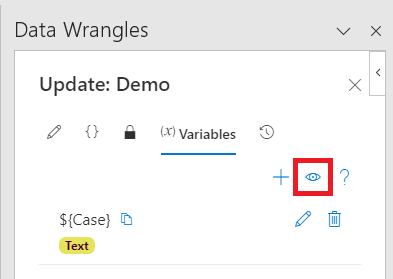
¶ System Variables
System variables are default variables that are available in all recipes automatically. In order to show system variables, click on the eye icon on the top right while in the variables tab shown below highlighted in red.
| Variable | Function |
|---|---|
${batch_number} |
Gives the current batch number. |
${batch_total} |
Gives the total number of batches. |
${date} |
Gives the current date (in the local time zone) as yyyy-mm-dd format. |
${file_name} |
Gives the name of the active file. |
${now} |
Gives the current UTC date and time in ISO 8601 format. |
${row_count} |
Gives the number of visible rows processed in each batch. |
${selection} |
Gives the leftmost column heading of the selected data. |
${selection_0}, ${selection_1}, ... |
Gives the column heading corresponding to a specific position in the input. Starts from 0. |
${sheet_name} |
Gives the name of the active worksheet. |
${user_email} |
Gives the email of the user. |
${user_name} |
Gives the full name of the user. |
¶ Versions
Versions allow users to restore previous versions of the recipe. Versions store the last 30 iterations, or every iteration for the prior week. So, for instance, if a recipe has had 40 iterations in one week those 40 will be stored for one week then the first 10 (oldest versions) will be dropped leaving the 30 most current iterations.
Each version is tagged with the editor's initials as shown below. To load a version, simply click the cloud button with the down arrow.
A star icon is shown next to the current version in use. Versions can be tagged by the user in order to leave a short note about the particular version, but tags can only contain letters, numbers, underscores and periods. For a longer description of the version, the Notes tab can be used. Versions can also be deleted, which helps keeping them stored under the cut off limit. The Compare button can be used to see the changes from other versions to the current, the version comparing to will always be loaded on the left.
To access versions, simply click on the reverse clock icon in the Update: Recipe panel. Below shows an example of versions.
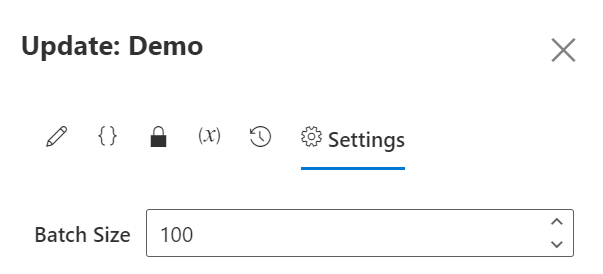
¶ Settings
As of today (4/29/2024) there is only one recipe setting and that is Batch Size.
¶ Batch Size
The Batch Size setting determines how many rows of data are passed through the recipe at once, where the default value is set to 100 rows. This is useful for controlling the speed of your recipe. If your recipe is short, simple and runs very quickly, increasing the batch size will allow the data to be processes quicker as a whole. If you have a much longer, complicated recipe that times out, then decreasing the batch size will allow the recipe to process less rows at once and possibly avoid timing out.
¶ Excel Connector
The Excel connector allows users to write to different sheets and much more. Click the link for more details.
Warning: When setting a sheet name to longer than 31 characters (Excel's limit), the sheet name is cut short. This will causes errors if the recipe is run more than once without deleting prior generated sheets.
¶ Limitations
- The maximum runtime for a single recipe execution is 28 seconds. By using smaller batches, the total execution time can be unlimited, but each batch must complete within the time limit.
- Recipes can only read and write from sources connected to the internet.